Good pipetting pratices are essential as pipetting is one of the most common handling processes for laboratory technicians.
Even with a seasonned experience, repetitive actions can make the task boring. If the workbench is disorganized, mistakes can quickly occur, and then MSPs arrise if the lab technician does not adopt the proper position.
Thanks to the expertise of a former laboratory technician, we provide you with some advice to ensure your daily comfort and to maximize the analysis conformity.
Pipetting workspace organization for good pipetting pratices
Before handling liquids, it is essential to correctly set up your workbench. Having an organized workbench may seem like a pain for some people. But you should know that it is a real time saver during handling and greatly reduces the risk of errors.
During pipetting, the workbench is split into 3 distinct areas:
- Storage area – This area mainly contains the micropipettes on their stand as well as any other material you may need (microcentrifuges, tips…). You can place this area to your left as it is the least used.
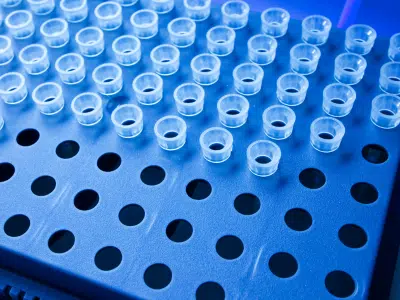
- Working area – Facing you, in a wider area, place only the materials you need to handle: samples and reactives. This area should be as empty as possible to allow you to move easily.
- Waste area – On your right, keep hazardous waste box. The opening should be turned to face you so that you can directly throw away tips that are in contact with the substance you have collected.

Adopt right positioning and ergonomics for pipetting
Remember that the movement’s precision is a key for a proper pipetting.
To improve technician’s comfort, when the movements become too repetitive, it is recommended to alternate between standing and sitting positions. This will improve blood circulation and reduce the amount of static work in daily routines that causes MSPs.
In what posture should I pipette?

Sitting position
- Back and knees at right angles
- Head straight
- Elbow bent

Standing position
- Straight position from head to toe
- Elbow at right angle
- Grip aligned with forearm
Other helpful tips to reduce the risk of MSPs
Choose the right seat !
Choose a suitable chair for this activity. Some features should not be forgotten, such as seat and back height adjustment and quality ergonomic foam padding.
This will allow you to work in the most comfortable way possible.
Choose the right micropipette !
The strength of the push buttons differs from one model to another. It is highly advised to test the pressure with your thumb, the movement should be soft and easy.
Good practices for micropipette use
Micropipette volumetry
Before starting pipetting, it is important to select the right volume:
- Volume reading – To complete this task sucessfully, the eye should be placed straight in front of the reading screen. Thus, the point will be perfectly positioned on the right volume.
- Volume setting – This is easily done by holding the pipette with one hand and turning the push button with the other, up or down, until the required volume is reached.
Pipetting mode: direct method
The direct method is equivalent to using a volumetric pipette with 1 mark. This means that this application is less accurate than the reverse method, but this has no impact in some situations such as transfers or liquid handling with an aqueous nature.
Want to increase the repeatability accuracy in case of aliquoting ? We can do a tip pre-rinse by pipetting a first time and rejecting the sample in the container.

Step 1:
Press the push button to the 1st level
Step 2:
Dip the tip about 1cm into the liquid and then slowly release the push button. Remove the tip by pressing it against the reservoir’s neck to remove the excess liquid.
Step 3:
Dispense the liquid by slowly pressing the push button to the 1st level. Stop for about 1 second, then push the button to the 2nd lock. This action will completely empty the tip.
Step 4:
Release the button to its inactive position. Change the tip if necessary, then continue pipetting.
Pipetting mode: reverse method
Regarding the reverse method, it is considered as “the good method”. It is the equivalent of a volumetric pipette with 2 marks, thus more precise. This is why it is recommended when precision is critical in the analysis e.g. for volatile, foaming or viscous products.

Step 1:
Press the push button to the 2nd level
Step 2:
Dip the tip about 1cm into the liquid and then slowly release the push button. Remove the tip by pressing it against the container neck to remove the excess liquid.
Step 3:
Dispense the sampled volume by carefully pushing the button to the 1st lock. Keep the push button in this position. Some of the liquid should remain in the tip and will not be dispensed.
Step 4:
The remaining liquid should be removed with the tip or returned to the reservoir.
More tips about pipetting
Micropipette vertical storage
This is not an option for the laboratory technician. Storing the micropipettes on a dedicated stand avoids any contamination risk with dirty pipette or infected tip.
Tip ejection directly into the IHW containers
As seen at the beginning of the article, the IHW containers opening must be positioned facing you. Indeed, it allows the tip to be ejected directly into it, thus avoiding any contamination risk for the bench or other potential elements.
Fix the tip(s) on the micropipette
Single-channel pipette
Hold the pipette with one hand and press down with a slight twisting movement – about a quarter – to allow the pipette’s tip to fit properly and ensure a tight seal.

Multi-channel pipette
Use a slight swing to secure the tips in one movement.

Looking for pipetting equipment that perfectly meets laboratory technicians needs is not always an easy task. That’s why LABELIANS offers high quality products that respect the users comfort, by considering the technician’s issues on the bench.